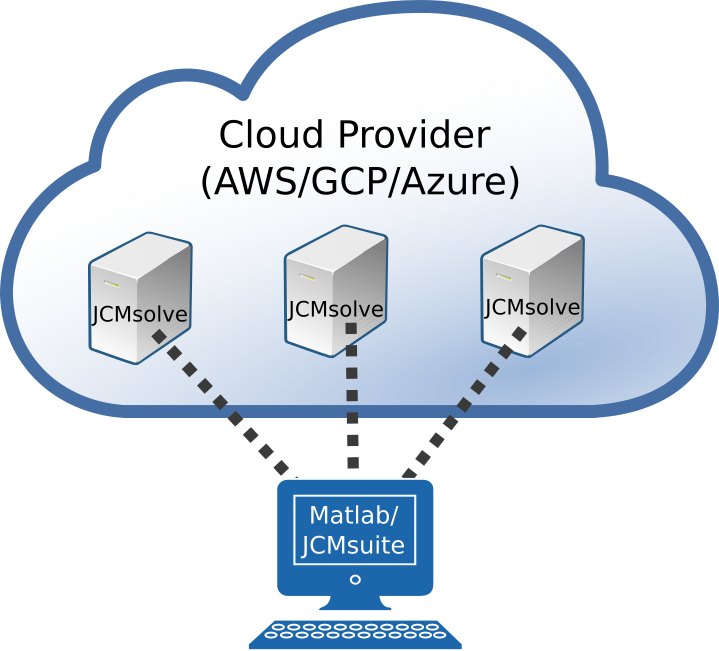
Cloud Computation
In this tutorial we show how to use cloud-based computational resources for the example of Amazon Web Services (AWS). Computation resources of other cloud providers such as Google Cloud Platform (GCP) and Microsoft Azure can be integrated in a similar manner.
If you want to execute the sample code you need to create an account at AWS (https://aws.amazon.com/resources/create-account/). Afterwards you get the possibility to use small, free tier computing resources.
Step 1: Create a Key Pair
For securely connecting to an AWS machine you need to create a SSH key pair. To this end open
the Key Pairs section of the Amazon management console (https://console.aws.amazon.com/ec2/#KeyPairs).
Click on Create Key Pair and choose a name for the key pair (e.g. KeyPairAWS). Save the created
file containing the private key in some appropriate path (e.g. ~/.ssh/KeyPairAWS.pem).
Step 2: Launch a new Instance
Now we can launch a new Elastic Compute Cloud (EC2) instance.
- Open the EC2 management console (https://console.aws.amazon.com/ec2/#Instances) and click on Launch Instance.
- Choose a Linux image (e.g. the first listed image
Amazon Linux 2 AMI (HVM), SSD Volume Type) and click on Select. - In the next step you can choose the image type, i.e. the number of virtual CPUs,
the memory size, and the storage size. For test purposes you can choose a free tier eligible
t2.microinstance with one CPU and 1 GB of RAM. Click on Review and Launch and then on Launch. - Select the key pair for connecting to the instance and click on Launch Instances.
- Click on View Instances and wait until all
Status Checksare passed (signified by a green check mark). - Copy the
Public DNSof the instance to the clipboard (e.g.ec2-11-222-333-44.us-west-2.compute.amazonaws.com)
Step 3: Install JCMsuite
Before we can integrate the instance as a computing resource via the JCMdaemon we need to set up a minimal JCMsuite environment on the instance:
Hostname = '<EC2 DNS>';
Login = 'ec2-user';
PEMFile = '<PATH TO PEM FILE>';
RemoteJCMROOT = '/home/ec2-user/bin/JCMsuite';

jcmwave_daemon_install_remote_environment(...
        'Hostname', Hostname,...
        'Login', Login,...
        'JCMROOT', RemoteJCMROOT,...
        'PEMFile', PEMFile,...
        'IncludePython', 'No');
The Hostname variable must be replaced by the copied value of Step 2
(e.g. ec2-11-222-333-44.us-west-2.compute.amazonaws.com).
The PEMfile variable must be replaced by the path to the key pair file
(e.g. /home/USERNAME/.ssh/KeyPairAWS.pem).
In many cases the remote environment does not require a Python
installation, which has a size of about 1 GB. Only if, e.g., user-defined field sources,
material tensors or integration densities are provided as Python expressions,
Python has to be included in the installation. Therefore, we set IncludePython to
False to speed up the installation process.
If you are prompted to add the identity of the remote instance as a known host, type ‘yes’ and click OK.
Note
The installation files are extracted from the JCMsuite installation of you local Linux machine. If the local computer runs under Microsoft Windows the installation step has to be performed manually.
Download a the Linux installation with the same version number as the locally installed JCMsuite version from https://installation.jcmwave.com/.
Upload the installation script to the remote machine. For example, run:
scp -i ~/.ssh/KeyPairAWS.pem ~/Downloads/JCMsuite_<VERSION>.run ec2-user@<EC2 DNS>:~
Open a ssh session to the remote instance that forwards the license server and port (e.g.
maxwell:8992) to a remote port:ssh -i ~/.ssh/KeyPairAWS.pem -R 8992:maxwell:8992 ec2-user@<EC2 DNS>
Run the installation on the remote instance:
sh ~/JCMsuite_<VERSION>.run
When prompted choose to configure the license and to use license server (option 5). As a license server enter
localhost:8992.
Step 4: Save Image (optional)
After the installation it is possible to save the instance as an Amazon Machine Image (AMI).
In the Instances section of the AWS management console (https://console.aws.amazon.com/ec2/#Instances)
click on Action -> Image -> Create Image. Chose a name for the image (e.g. JCMsuite-<VERSION>)
and click on Create Image. The status of the image can be checked in the Images section of the
management console (https://console.aws.amazon.com/ec2/#Images).
The next time you launch a new instance you can chose the created image from custom AMIs to avoid repeating the JCMsuite installation step.
Note
The JCMsuite version of the remote instance must correspond to your local version. Otherwise JCMdaemon cannot communicate with the remote instance.
Step 5: Add Instance
The remote instance can now be added as a workstation in the usual way by calling
jcmwave_daemon_add_workstation(...
        'Hostname', Hostname,...
        'Login', Login,...
        'JCMROOT', RemoteJCMROOT,...
        'PEMFile', PEMFile,...
        'NThreads', 1,...
        'LicenseServerPort', 8992);
Since the remote instance cannot directly access the local license server, it looks for the license server
at localhost:8992. By setting LicenseServerPort = 8992 the local license server is made accessible
via a remote port forwarding.
Step 6: Use Instance
The added workstation now behaves like any other machine added within your local network. For example one can run a parameter scan as in the tutorial example Parallel Parameter Scan:
radii = [0.3 : 0.05 : 0.5];
job_ids = [];

for radius = radii
  keys.radius = radius;
  job_ids(end+1) = jcmwave_solve('mie2D.jcmp', keys, 'temporary', 'yes');
end

[results, logs] = jcmwave_daemon_wait(job_ids);

scattering_cross_section_scan = [];
for iR = 1 : length(radii)
  scs = real(results{iR}{2}.ElectromagneticFieldEnergyFlux{1});
  scattering_cross_section_scan(end+1, 1 : 2) = [radii(iR), scs];
end

%% plot scattering cross section against rod radius
radii = scattering_cross_section_scan(:, 1);
scs = scattering_cross_section_scan(:, 2);
plot(radii, scs, '-+', 'LineWidth', 2);
xlabel('radius [\mu m]', 'FontSize', 14);
ylabel('integral scattering cross section', 'FontSize', 14);
set(gca, 'FontSize', 14);
jcmwave_daemon_shutdown();
| [license] | The image “Cloud computation with JCMsuite/Matlab” is a derivative of Antu folder-cloud by Fabián Alexis, Gorilla-server by George Boukeas, and Blue computer icon by Perhelion, all used under CC BY. “Cloud computation with JCMsuite/Matlab” is published under CC BY by Philipp Schneider. |
